Hey everyone, it’s Jake, and I’ve spent the last eight years working side-by-side with automatic plastic cylinder machine operators—so let’s cut to the chase: replacing a mold shouldn’t be the scary, rushed chaos I see it turn into on shop floors every other week. I’m not here to give you generic, read-from-a-manual steps; these are the tricks we’ve tested in our own service bays and on hundreds of client lines that actually work. Plus, as a supplier, our whole job is making this process faster, safer, and less likely to cost you a week of downtime. Automatic Plastic Cylinder Machine
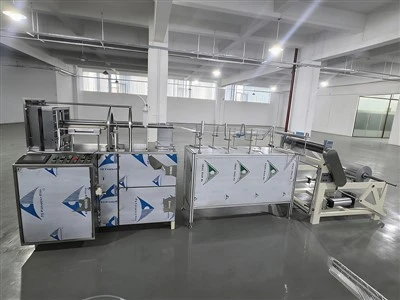
First, let’s get one thing straight: mold replacement for automatic plastic cylinder machines isn’t the same as swapping a part on your old coffee maker. Automatic cylinders are precision tools—even a tiny misalignment in the mold can lead to warped edges, uneven cuts, or leaks that waste 20% of your material and three hours of rework. I’ve seen a client try to skip a pre-check once, and they ended up scrapping 1,200 flawed cosmetic plastic cylinders for the food and beverage industry. That’s $15k down the drain just because they were in a hurry. So before you even touch a wrench, let’s lay the groundwork with the three non-negotiable pre-steps.
First, lock out/tag out (LOTO) your machine. This isn’t some OSHA buzzword—this is how you keep your hands and fingers intact while working on moving parts. Every day, one of our service techs gets called to a shop where someone forgot to lock the control panel and the machine cycled mid-mold swap. The worst case I saw last year? An operator lost a fingertip when the clamping mechanism activated unexpectedly. So grab your LOTO padlock, put it on the main power switch, and don’t let anyone remove it until you’ve finished the entire replacement and tested the machine at half speed.
Next, do a pre-inspection of the old mold. Don’t just yank it out—note exactly how it sits. Take two photos: one of the alignment pins lining up with the machine’s mounting holes, and another of the clamping bolts’ torque settings. I keep a disposable camera in my service bag for this, but most operators use their phones now—just make sure you label the photos (like “top mold, 12mm torque, left pin”) so you don’t guess later. Also, check for any residue: plastic shavings, leftover mold release, or even a tiny piece of a previous cylinder stuck in the crevices. Wipe that out with a lint-free cloth and isopropyl alcohol—if you leave gunk there, the new mold won’t seat flat, and you’ll get flashing (that excess plastic around the edges) on every cylinder.
Then, grab your tools and supplies. You don’t need a whole toolbox, but you do need specific stuff: a torque wrench (10mm, 12mm, and 14mm sockets for most of our standard machines), a rubber mallet (never a metal one—you’ll ding the mold’s precision edges), a mold release spray (silicone-based is fine for most applications, but ask if you’re working with FDA-approved materials), and a set of feeler gauges (for checking gaps after mounting). If you’re working with a custom mold for things like small battery cylinders, you might also need a hex key set for the locking collars.
Now, the actual replacement process. Let’s break this down step-by-step, the way we teach new operators in our training sessions. Step one: release the old mold. First, loosen the two clamping bolts on each side of the machine—don’t yank them out all the way, just loosen them until they’re finger-loose. Then, carefully work the mold off the alignment pins. Here’s the trick: gently tap the mold’s top edge with the rubber mallet if it’s stuck, not the center. Tapping the center can warp the mold’s core, which is the part that forms the cylinder’s inner diameter. Once it’s free, set it on a sturdy surface—never lay it on its edge, stand it upright to prevent damage.
Step two: prep the new mold. First, wipe the entire mounting surface with that isopropyl alcohol cloth—any dust or oil from storage will throw off alignment. Then, apply a thin, even coat of mold release to the mold’s outer edges and the core. Don’t overdo it—too much release can cause plastic to not stick where it’s supposed to, like in cylinder joints. If your new mold is a top/bottom set, make sure you don’t mix them up; we stamp “TOP” and “BOTTOM” on every custom mold for this exact reason, but if you don’t see that, check the water lines (top molds usually have more cooling lines to keep the plastic from setting too fast in the upper section).
Step three: mount the new mold. Align the mold’s alignment pin holes with the machine’s pins first—this is where those photos you took earlier come in. If you’re struggling, don’t force it; double-check that you didn’t turn the new mold around. Once the pins are seated, hand-tighten the clamping bolts on each side, then use the torque wrench to tighten them in a crisscross pattern. Most of our machines recommend 12 Nm for clamping bolts—tightening one all the way first will pull the mold out of alignment. Crisscross means left-top, right-bottom, right-top, left-bottom—this spreads the pressure evenly, so the mold seats flat and doesn’t shift during operation.
Step four: calibrate and test. This is the step I see operators skip more than any other, and it’s the one that prevents 90% of future issues. First, use the feeler gauges to check the gap between the top and bottom molds around the entire circumference—all gaps should be 0.05mm or less. If there’s a bigger gap on one side, that means the clamping bolts are unevenly tight; loosen them all and redo the crisscross torque. Then, test the machine at low speed with a small amount of scrap plastic. Run three or four cycles, then take the cylinders and check for flashing, warping, or misaligned seams. If they’re perfect, you’re good to go—but wait, don’t turn the machine up to full speed yet. Run a 10-minute test run at 50% speed to make sure the mold isn’t overheating or causing strain on the machine’s motor.
Now, let’s talk about common mistakes we see that turn a 30-minute replacement into a 4-hour disaster. First, forcing the mold onto the alignment pins. If it’s not sliding on smoothly, stop and check for debris or if you flipped the mold. Second, skipping torque. I had a client last month who tightened bolts with an adjustable wrench instead of a torque wrench, and after an hour of full-speed operation, a bolt worked loose, the mold shifted, and they had to replace a $2,000 mold core. Third, not LOTO-ing. Like I said earlier, that’s non-negotiable—even the most gentle machine can cycle unexpectedly. Fourth, not checking for mold compatibility. Not all molds work with all automatic plastic cylinder machines; if you bought a third-party mold, make sure the mounting holes and alignment pins match our standard specifications, or you’ll have to modify it, which wastes time and money.
As a supplier, our job isn’t just to sell you machines and molds—it’s to make sure you can keep them running smoothly. That’s why we include a free 30-minute virtual training call with every machine purchase, and we have a 24/7 service line for when you run into issues during mold replacement. We also stock all the standard molds for our machines in our warehouse, so if you need a replacement quickly, we can ship it same-day.
Wait, one last pro tip: keep a dedicated mold storage case at your shop. Label each mold with the machine it belongs to, the production run it’s for, and the last time it was replaced. We’ve had clients who mix up molds between machines, and that leads to constant re-calibration and downtime. A $50 plastic case with foam inserts will save you hundreds in wasted material and labor.
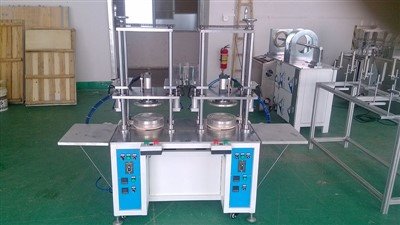
At the end of the day, mold replacement for automatic plastic cylinder machines doesn’t have to be a headache. It’s a process that takes 30 minutes if you follow the steps, skip the shortcuts, and take your time. If you’re looking to upgrade your molds, replace a worn-out one, or just want to ask for tips specific to your machine, we’re here to help. Our team has years of experience working with every type of automatic plastic cylinder machine, and we can help you find the right mold for your production needs.
Blister Round Cover Cutting Machine References
- Occupational Safety and Health Administration (OSHA), Lockout/Tagout Standard, 29 CFR 1910.147, U.S. Department of Labor, Washington, D.C.
- Plastic Machinery Manufacturers Association (PMMA), Best Practices for Mold Installation on Automatic Blow Molding Machines, PMMA Technical Bulletin 2022-03, Arlington, VA.
- SAE International, Precision Requirements for Plastic Cylinder Molds, SAE J2897, Warrendale, PA.
Titagong (Dongguan) Machinery Co., Ltd.
We are one of the most reliable manufacturers and suppliers of automatic plastic cylinder machine in China. With abundant experience, we warmly welcome you to buy bulk high quality equipment in stock here and get pricelist from our factory. For price consultation, contact us.
Address: No.149, Qingyi Road, Qingxi Town, Dongguan City, Guangdong Province, China
E-mail: shuaizoe@gmali.com
WebSite: https://www.titagonggroup.com/
